The Raspberry Pi (RPi) is a great strong device to play with. It is definiately not the perfect gadget to run resource hungry IDE, and develop c, c++, web… or Java applications on. Use your own laptop or desktop computer to build your code, test it and debug it while the code is running on the device. NetBeans for Mac (and Windows) is a reliable IDE with remote testing and deployment options.
Recommended configuration steps
The guide is based on Mac (OS X), NetBeans 8.0 java project, and Raspberry Pi with Raspbian. C or c++, web… etc. projects can be tested and deployed the same way.
Prepare Raspberry Pi
Switch on your device and connect it to your network. Look after these:
1. SSH is enabled.
SSH is enabled by default. Run in the Terminal and navigate to Advanced Options -> SSH -> Enabled settings to see it:
2. Java is installed
In recent build of Raspbian, an Oracle Java runtime environment is pre-installed. Confirm Java installation by checking the Java VM version and build. Run in the Terminal:
When missing, install the latest java version like:
3. Raspberry Pi is connected to your network (or WiFi router)
It’s highly recommended. You likely have an Internet access. Configuration guide is available here.
4. You know the user name, password, and ip address of Raspberry Pi
5. Remote desktop protocol is installed and you can see the RPi from your Mac (optional)
Configuration guide is available here.
Configure NetBeans
1. Open NetBeans 8+ and find Java Platform Manager
– Navigate to your project, click on the project name and open Properties dialog box
– Among the Categories select Libraries -> Manage Platforms
2. Set up a Remote Java Platform for RPi
– Click on Add Platform…
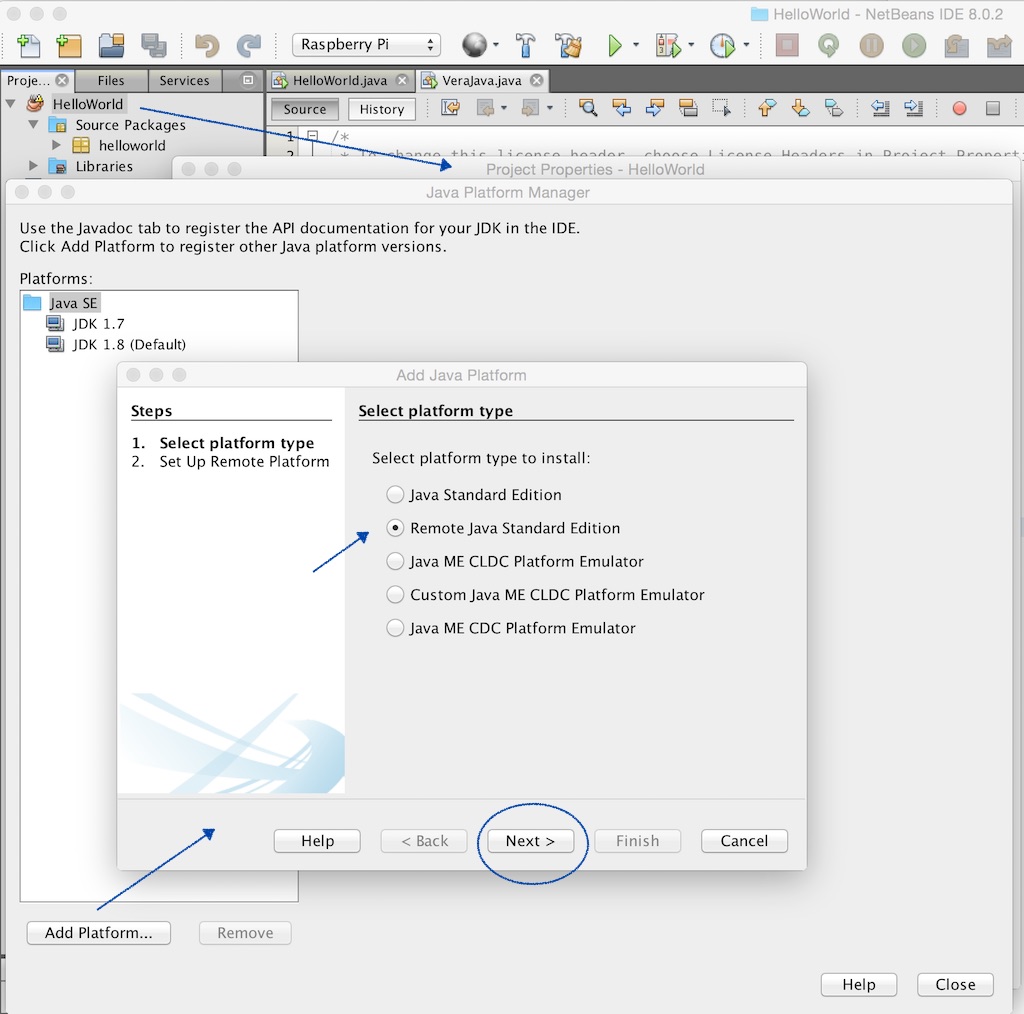
– Select Remote Java Standard Edition. Click on Next.
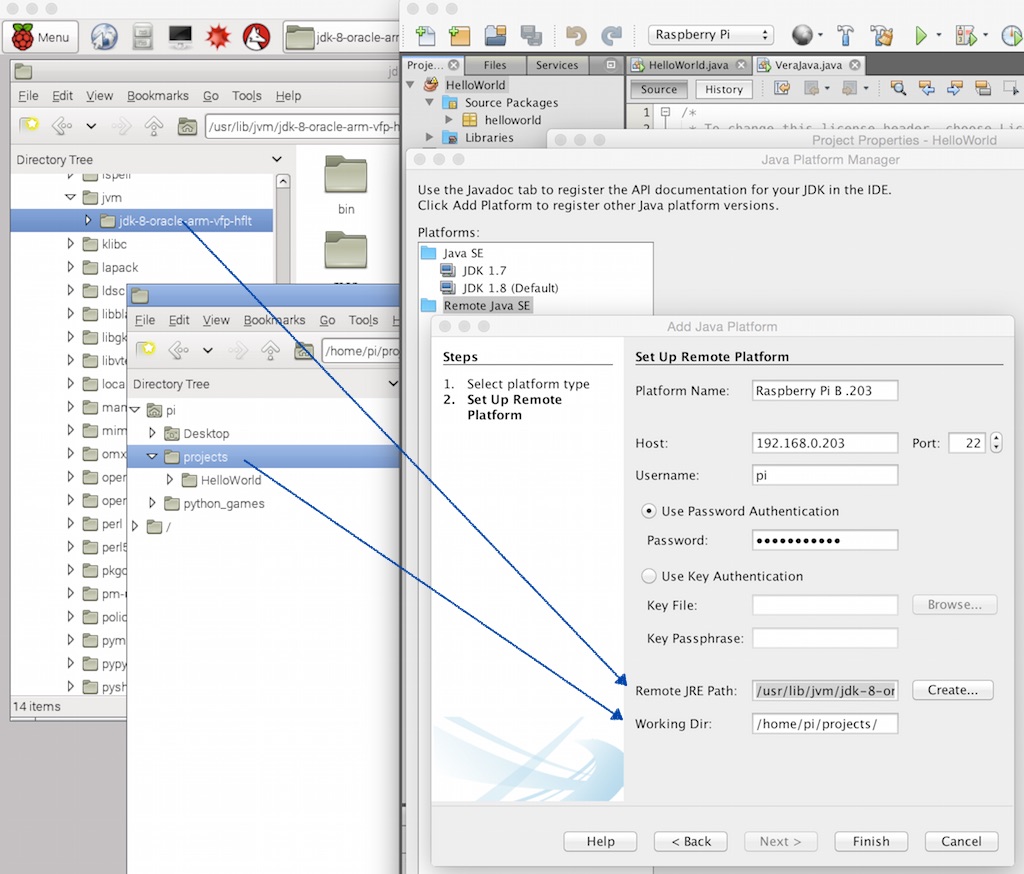
– Type in your platform name, RPi ip address, SSH port number (22),user name and password.
– Open your Remote Desktop for Raspberry Pi or use your RPIs monitor, mouse and keyboard to find and note the name of your project folder and java installation folder. For example: /home/pi/projects and /usr/lib/jvm/jdk-8-oracle-arm-vfp-hflt. Type in folder names into Java JRE Path and Working Dir text fields.
– Click on Finish. If the new remote platform and the Raspberry Pi is properly configured then you can see a success message in the NetBeans Console.
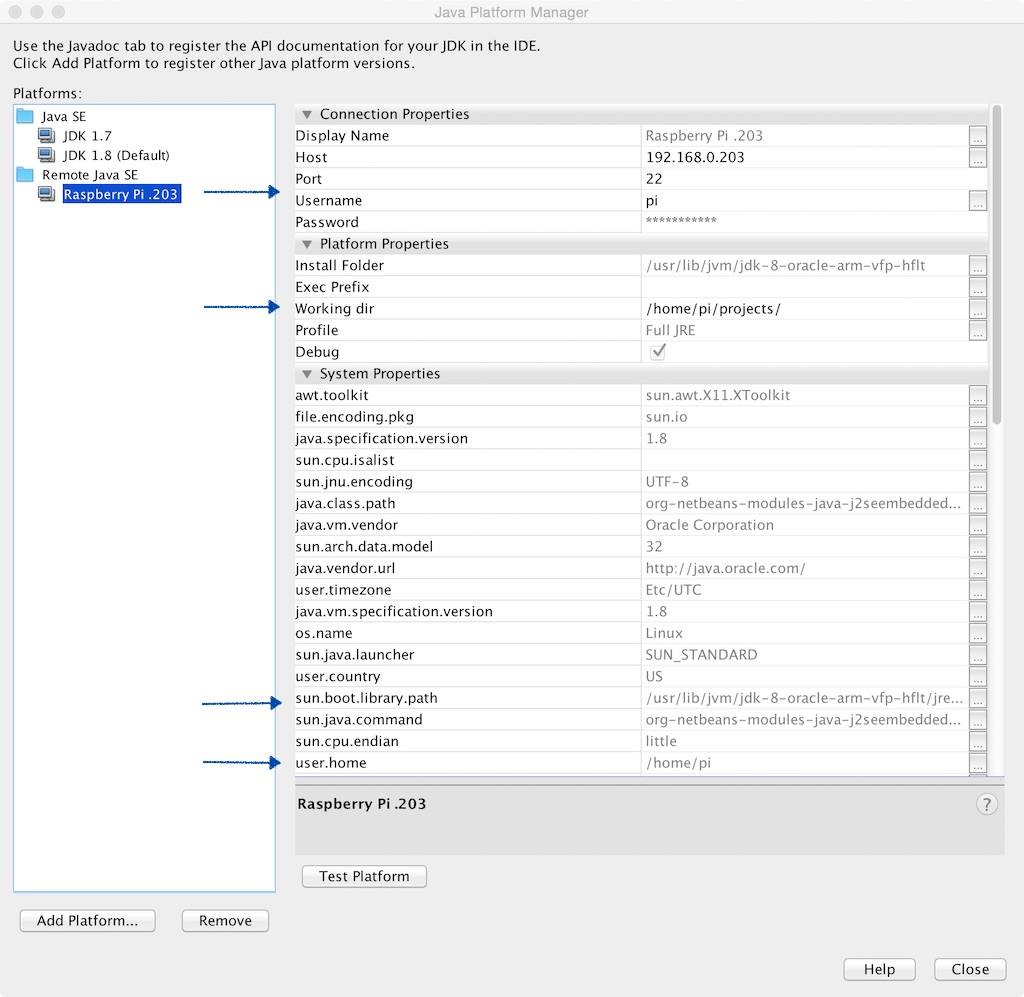
– Close the Java Platform Manager.
3. Set up your project runtime platform
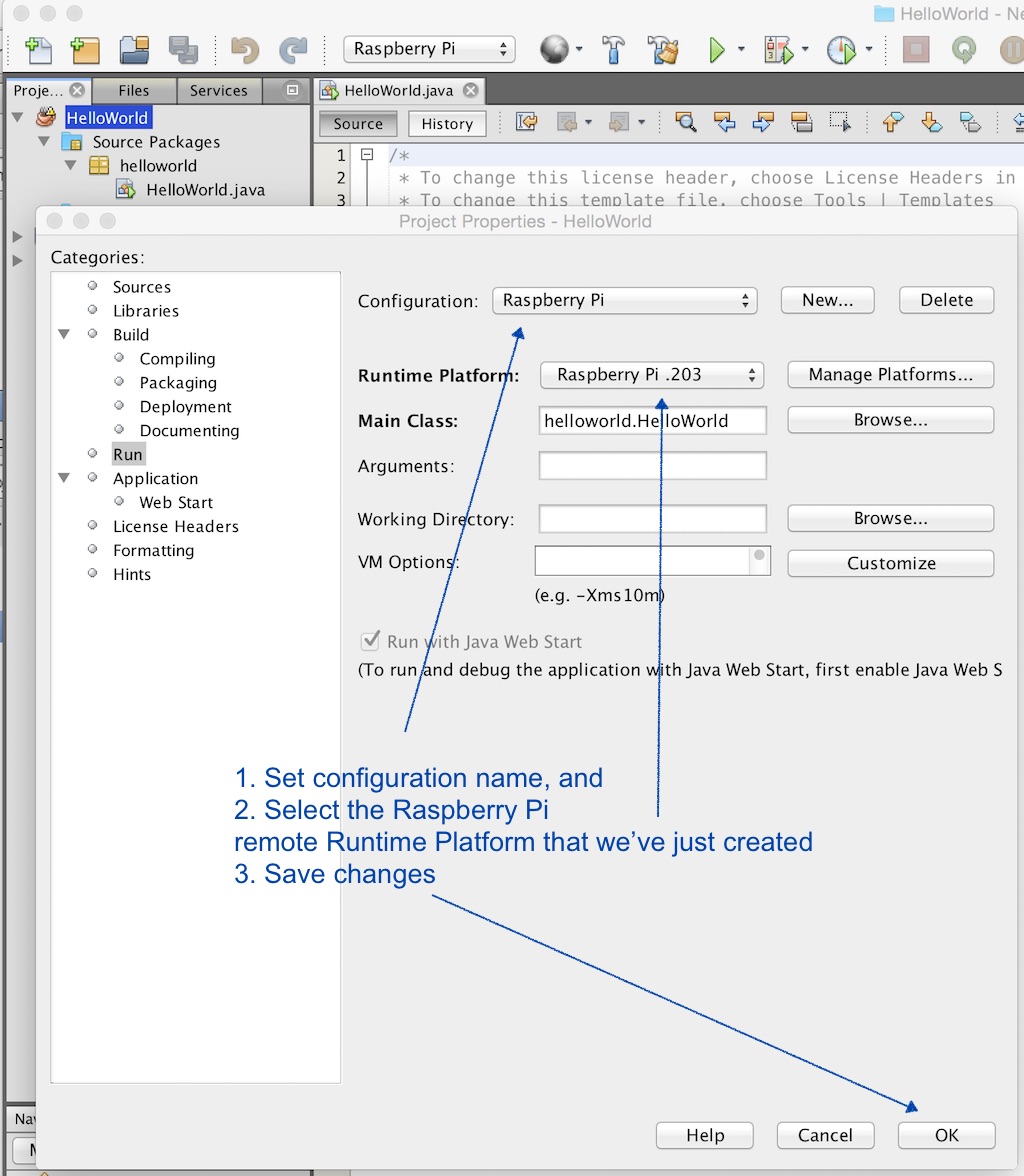
– In the project Properties dialog select Run category. Give a unique configuration name.
– Select the newly created remote platform from the Runtime Platform list.
– Click on OK.
– We are ready. Debug your application while the code is running on the device. Run your project. The project destination folder – for example HelloWorld/dist – will be deployed on the Raspberry Pi.
4. Run your tested and deployed app on Raspberry Pi
– Open Terminal on Raspberry Pi
– Navigate to your project folder
– Run your app, for example:
$ java -jar HelloWorld.jar
(Click on images to see a better view.)